March Block Lotto
Lots of you said that you would like to do more improv and curved piecing this year in our survey and this block really delivers! This month, we are going to be making beautiful improv ocean wave blocks. The curves are going to be very gentle, so they are easy to sew, with just a little easing as you go, no pins required!
Our colour palette is shades of blue, inspired by the all the colours of the ocean, from bright tropical turquoise to deep inky blues. Stick to solids, tone-on-tone prints, or subtle texture prints, that read as mostly solid blue to the eye. You could even use other woven fabrics, like a linen-blend, cotton shirting, lightweight chambray or cross weave (like shot cotton), as long as it is a blue fabric!

This project is fat quarter friendly, we will be starting off with 18″ long strips of fabric, about 3-4″ wide. We will need about 5-6 strips to make each block, although this depends on how wide you cut your strips.
To make our waves pop, try to alternate shades or values of blue as you build your block, so that the contrast between waves is visible. You can choose to make your blocks with as few as 2 alternating shades of blue, or you can use as many different colours as you have strips of fabric.

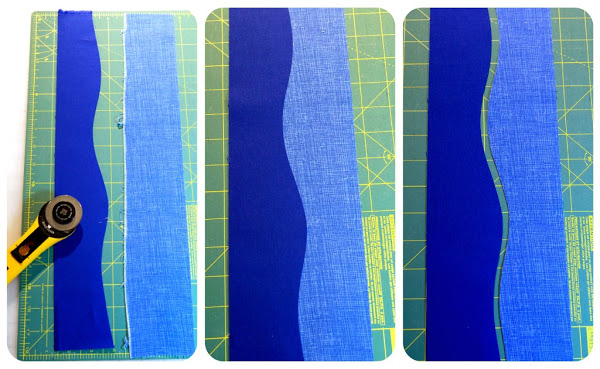
Start by cutting your first strip, with a rotary cutter or scissors, to add a gentle undulating wave to one edge. Once you have your first curve cut, overlap that fabric with your next strip of fabric, so that you see no raw edge, and both strips are right sides facing up. You want these to both just barely overlap, to minimize waste. Using a pair of scissors, or your rotary cutter, cut the second strip so the curves match together. I found scissors actually easier to cut the matching curve, but you could also trace the curve with a fabric pen and then cut it out separately so that you don’t need to worry about the fabric shifting around. Remember to cut as directed, DO NOT try to cut them in one go by putting right sides together, this will result in two strips that cannot be sewn into a flat block, it will be sad, don’t do it!

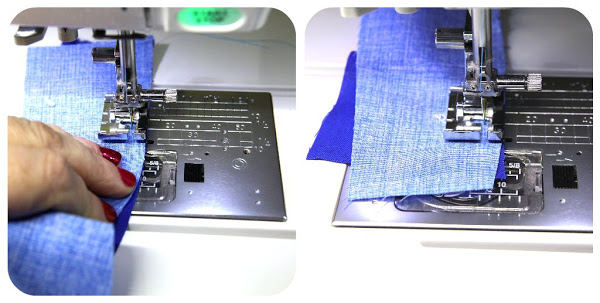
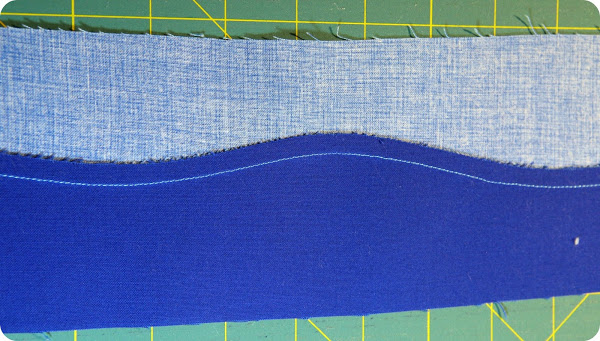
Flip one strip onto the other, and sew them together using your 1/4″ piecing foot. As you go, you will need to ease the edges so they align. Go slow, and keep adjusting the fabric so that the two edges align as they just go under your presser foot. It helps to keep your needle in the down position, so you can occasionally lift the presser foot to realign the edges. Keeping your waves very gentle will help make this really easy. I sewed this seam, without any pinning, and ended up with only a small difference in length at the end. This won’t matter, as when the block is finished, we will trim it down.

When you have finished sewing your first seam, take it to your pressing station and press the seam to one side. A little spray starch like Best Press or some steam will help it lay flat. If you find you have a tiny pucker in your seam which won’t press out, you can sometimes unpick just a few stitches on either side, and then re-sew that small section again.
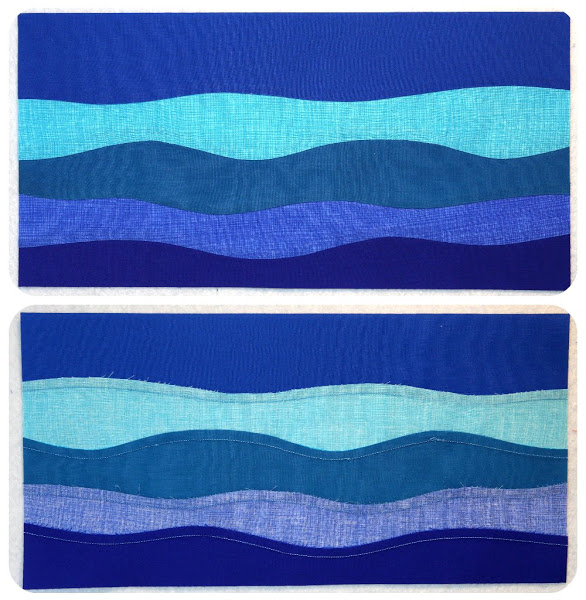
Repeat this process adding more strips to your block, till it is about 8.5″ to 9″ wide. Trim your final block to be 16″ x 8″. Your finished block can have as many or as few waves as you like, and it really depends on how wide your strips are and how much you trim off as you cut each wave shape. Here is one of mine from the front (top) and back (bottom).

If you need some extra help with learning to sew with curves, there are a lot of youtube tutorials online. Check out this one of Elisa Wilson or this one from Rob Appell showing two slightly different ways to handle sewing curves without pins! With a little practice, you will find the technique that works best for you.
I can’t wait to see all the beautiful ocean wave blocks you make next! Be sure to bring them to the April 21 Meeting for a chance to win them all!
